I finally worked out my zero waste pattern. It was really a challenge. Once I decided on the general shapes of my large pattern pieces (4 large rectangles for front and back, and the shape of my hood), it was really about laying them all out flat and seeing the negative spaces that could be used for other parts of the garment.
I had an idea for the closure of my bomber jacket that would require no notions (zippers/buttons). Most hoodies have ties that come out at the ends to change the fit of the hood. I decided to incorporate a longer version of these ties, and instead of have them control the fit of the hood, they are used to weave through fabric loops at the front of the coat to close it! I knew I would need one long piece of bias fabric for this hood tie closure, so I decided to have one long bias strip cutting through my pattern. This really helped me define my pattern layout, and I realized I was working with two triangles within a larger rectangle.
Once the back, front, and hood pieces filled up space, I really had one smaller triangle on each side from which to make the sleeves. I decided to divide it into one rectangle and two triangles, so that the two triangles could be combined into another rectangle. So in the end I had two rectangles to use for the sleeve.
 |
| Bomber Jacket front |
The sleeve cap was the hardest part. I noticed that a negative space left from the hood formed a shape similar to a sleeve cap. I measured the length I needed and adjusted the shape of the negative space to be the right length. Even though it wasn't the typical shape of a sleeve cap, I knew that as long as the length of the cap equaled the length of the armholes, it would fit!
Armholes had been a major issue when I was first trying to work out the pattern based on the letters "ECO" (which I gave up on). But I realized when making this jacket that the armholes could easily be turned into pockets! The only thing is that the front and back holes are slightly different, so the pockets would have to be made from the same armholes, and therefore they would not match perfectly. I decided to solve this issue by making interior pockets. You can't see how big they are and your hands won't be able to tell that they are a slightly different shape.
I had a few more pieces left over, but I was able to incorporate them into the hood and the sleeve. I was super impressed with myself! Until I went to sew it together... There is a problem with this pattern, the hood is not a symmetrical shape and so it appears in this pattern facing the same way both times. Meaning that when I went to cut out my pattern, one of my hood pieces was facing the wrong way, I had to sew it with the wrong side of the fabric facing out... (my fabric has two distinct sides). So that was a zero waste lesson for sure. I still think this pattern is great, however it must be used on a fabric that is the same on both sides.
 |
| Jacket back detail |
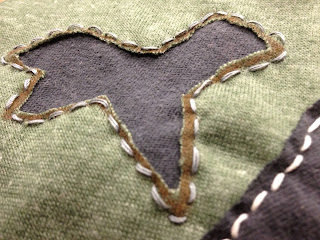
Zero waste taught me that there it takes a lot of thought and planning to make something work with no waste. It also leaves no room for error in a project like this. The hood issue really messed up my final look. I also accidentally cut into one piece of fabric while sewing it together, but I couldn't just start again. I had to make that cut a design line and add it to the pattern piece for the other side!
As a concept I think zero waste is great. We should be getting all that we can get out of our fabric resources. However I think that by working within the constraints of zero waste it limits design and functionally. You may design something you wouldn't normally design, or want to wear. Realistically I think designers should do their best to have as little waste as possible when they cut a pattern, however, I think a great solution is re-using those left over pieces. By throwing the scraps into a pillow case, using them to make jewelry, or recycling them into yarn, you are not wasting them at all. This is what some companies do, and I think it is 100% the most realistic and effective solution to zero waste.


